Table of contents
- What is a package manager in Linux?
- What is a package?
- Different kinds of package managers
- Difference between systemctl and service.
- Summary:
- Steps to install Docker and Jenkins tools using package managers on Ubuntu
- Installing Docker🚢🐳
- Step 1: Update Package Lists
- Step 2: Install Docker
- Step 3: Check Docker Version
- Step 4: Check Docker Status
- Step 5: Add USER to the Docker group to manage Docker as a Non-Root User
- Step 6: After adding USER to the Docker group reboot the instance once
- Step 7: Now, check USER is added to the Docker group
- Step 8: Stop Docker completely
- Installing Jenkins 🤖
- Step 1: Update Package Lists
- Step 2: Install Java Development Kit (JDK)
- Step 3: Check the Java-installed
- java -version
- Step 4: Add Docker Repository and Install Docker
- Step 5: Check Jenkins Status
- service Jenkins status
- Note: 🚨 By default, Jenkins won't be reachable from outside because AWS blocks incoming traffic. To make it accessible, open up port 8080 in the inbound traffic rules as demonstrated below. 🔓
- Login to Jenkins using the below URL:
What is a package manager in Linux?
A package manager in Linux is like a digital store for computer programs and software. 🛍️ It helps you find, download, install, update, and remove software on your Linux computer. 🖥️ Instead of searching the internet for software and manually installing it, you can use a package manager to easily browse and manage a collection of pre-packaged programs that are compatible with your Linux distribution. 🌐 This makes it convenient and efficient to keep your system up to date and install new software without the hassle of manual installations.
What is a package?
In Linux, a package is like a digital container that holds everything a piece of software needs to work on your computer. 📦 It's like a little box that includes the program itself, along with any necessary files, instructions, and details about how it should be installed. 🗂️ These packages are managed by the operating system's package manager, and they make it easier to install, update, and remove software because they contain all the necessary information and files in one neat bundle. Think of it as a gift box that contains not just the main present (the software) but also all the extra bits needed to make it work on your computer. 🎁
Different kinds of package managers
There are several package managers used in various Linux distributions. Here are some of the most commonly used ones:
APT (Advanced Package Tool): Used in Ubuntu and Debian. It manages software by installing, updating, and removing programs. 🌐
RPM (Red Hat Package Manager): Used in Red Hat, Fedora, and CentOS. It helps install, update, and remove software. 🎩
Pacman: Used in Arch Linux. It's a fast tool to install, update, and manage software. ⚡
DNF (Dandified YUM): Replaced YUM in newer versions of Red Hat-based systems. It's used to handle software installation and updates. 🔄
Portage: Used in Gentoo. It compiles software from source code, allowing for high customization. 🛠️
Apk: Used in Alpine Linux. It's a simple tool for managing software. 🏔️
These package managers help you install, update, and remove software on different Linux systems, each with its own specific way of doing things. 🐧

Difference between systemctl and service.
systemctl and service are both command-line utilities used for managing system services in Linux. However, they are associated with different init systems, and their usage can vary depending on the Linux distribution.🐧
systemctl:systemctlis part of the systemd init system, which has become the default on many modern Linux distributions.It provides a centralized way to manage services and other system processes.
The
systemctl statuscommand is used to display the status of a service, including information such as whether it is running, its process ID (PID), and recent log entries.For Docker, you would typically use
systemctl status dockerto check the status of the Docker service when using a distribution that uses systemd.⚙️
service:serviceis a more traditional way of managing services and is associated with init scripts.It's used on systems that use init or Upstart as the init system.
The
servicecommand is used to start, stop, restart, and check the status of services.For Docker, you might use
service docker statusto check the status of the Docker service on a system using init scripts.🔄
Summary:
If your system is using systemd, it's recommended to use
systemctlfor service management.If your system is using traditional init scripts, you can use
servicecommands.For Docker, the specific command may depend on your distribution and its init system.📦
In practice, many modern Linux distributions, such as Ubuntu 16.04 and later, use systemd. Therefore, systemctl is often the preferred way to manage services.🌐
Steps to install Docker and Jenkins tools using package managers on Ubuntu
Installing Docker🚢🐳
Docker, a widely used platform for developing, shipping, and running applications, is highly popular for its containerization capabilities. 🚢 Installing Docker on Ubuntu is a simple process, and using package managers like apt makes it beginner-friendly. 🐳
Step 1: Update Package Lists
sudo apt update

Step 2: Install Docker

Step 3: Check Docker Version
docker --version

Step 4: Check Docker Status
systemctl status docker

Step 5: Add USER to the Docker group to manage Docker as a Non-Root User
sudo usermod -aG docker $USER
Step 6: After adding USER to the Docker group reboot the instance once
sudo reboot
Step 7: Now, check USER is added to the Docker group
sudo cat /etc/group

Step 8: Stop Docker completely
sudo systemctl stop docker
sudo systemctl stop docker.socket
systemctl status docker

Installing Jenkins 🤖
Jenkins, an open-source automation server, is a powerful tool for continuous integration and continuous delivery (CI/CD)🔄. Installing Jenkins on Ubuntu can be a straightforward process, especially when utilizing package managers like apt or snap.🛠️**📦**
Step 1: Update Package Lists
Ensure your system’s package list is up-to-date by executing the following command in the terminal:
sudo apt update

Step 2: Install Java Development Kit (JDK)
Jenkins requires Java to run. If you haven’t installed Java on your system.
sudo apt install openjdk-11-jre

Step 3: Check the Java-installed
java -version

Step 4: Add Docker Repository and Install Docker
curl -fsSL https://pkg.jenkins.io/debian/jenkins.io-2023.key | sudo tee \
  /usr/share/keyrings/jenkins-keyring.asc > /dev/null
echo deb [signed-by=/usr/share/keyrings/jenkins-keyring.asc] \
  https://pkg.jenkins.io/debian binary/ | sudo tee \
  /etc/apt/sources.list.d/jenkins.list > /dev/null
sudo apt-get update
sudo apt-get install jenkins

Step 5: Check Jenkins Status
service Jenkins status

Note: 🚨 By default, Jenkins won't be reachable from outside because AWS blocks incoming traffic. To make it accessible, open up port 8080 in the inbound traffic rules as demonstrated below. 🔓
EC2 > Instances > Security > Inbound rules > Edit inbound rules > Add rule > Save rules

Login to Jenkins using the below URL:
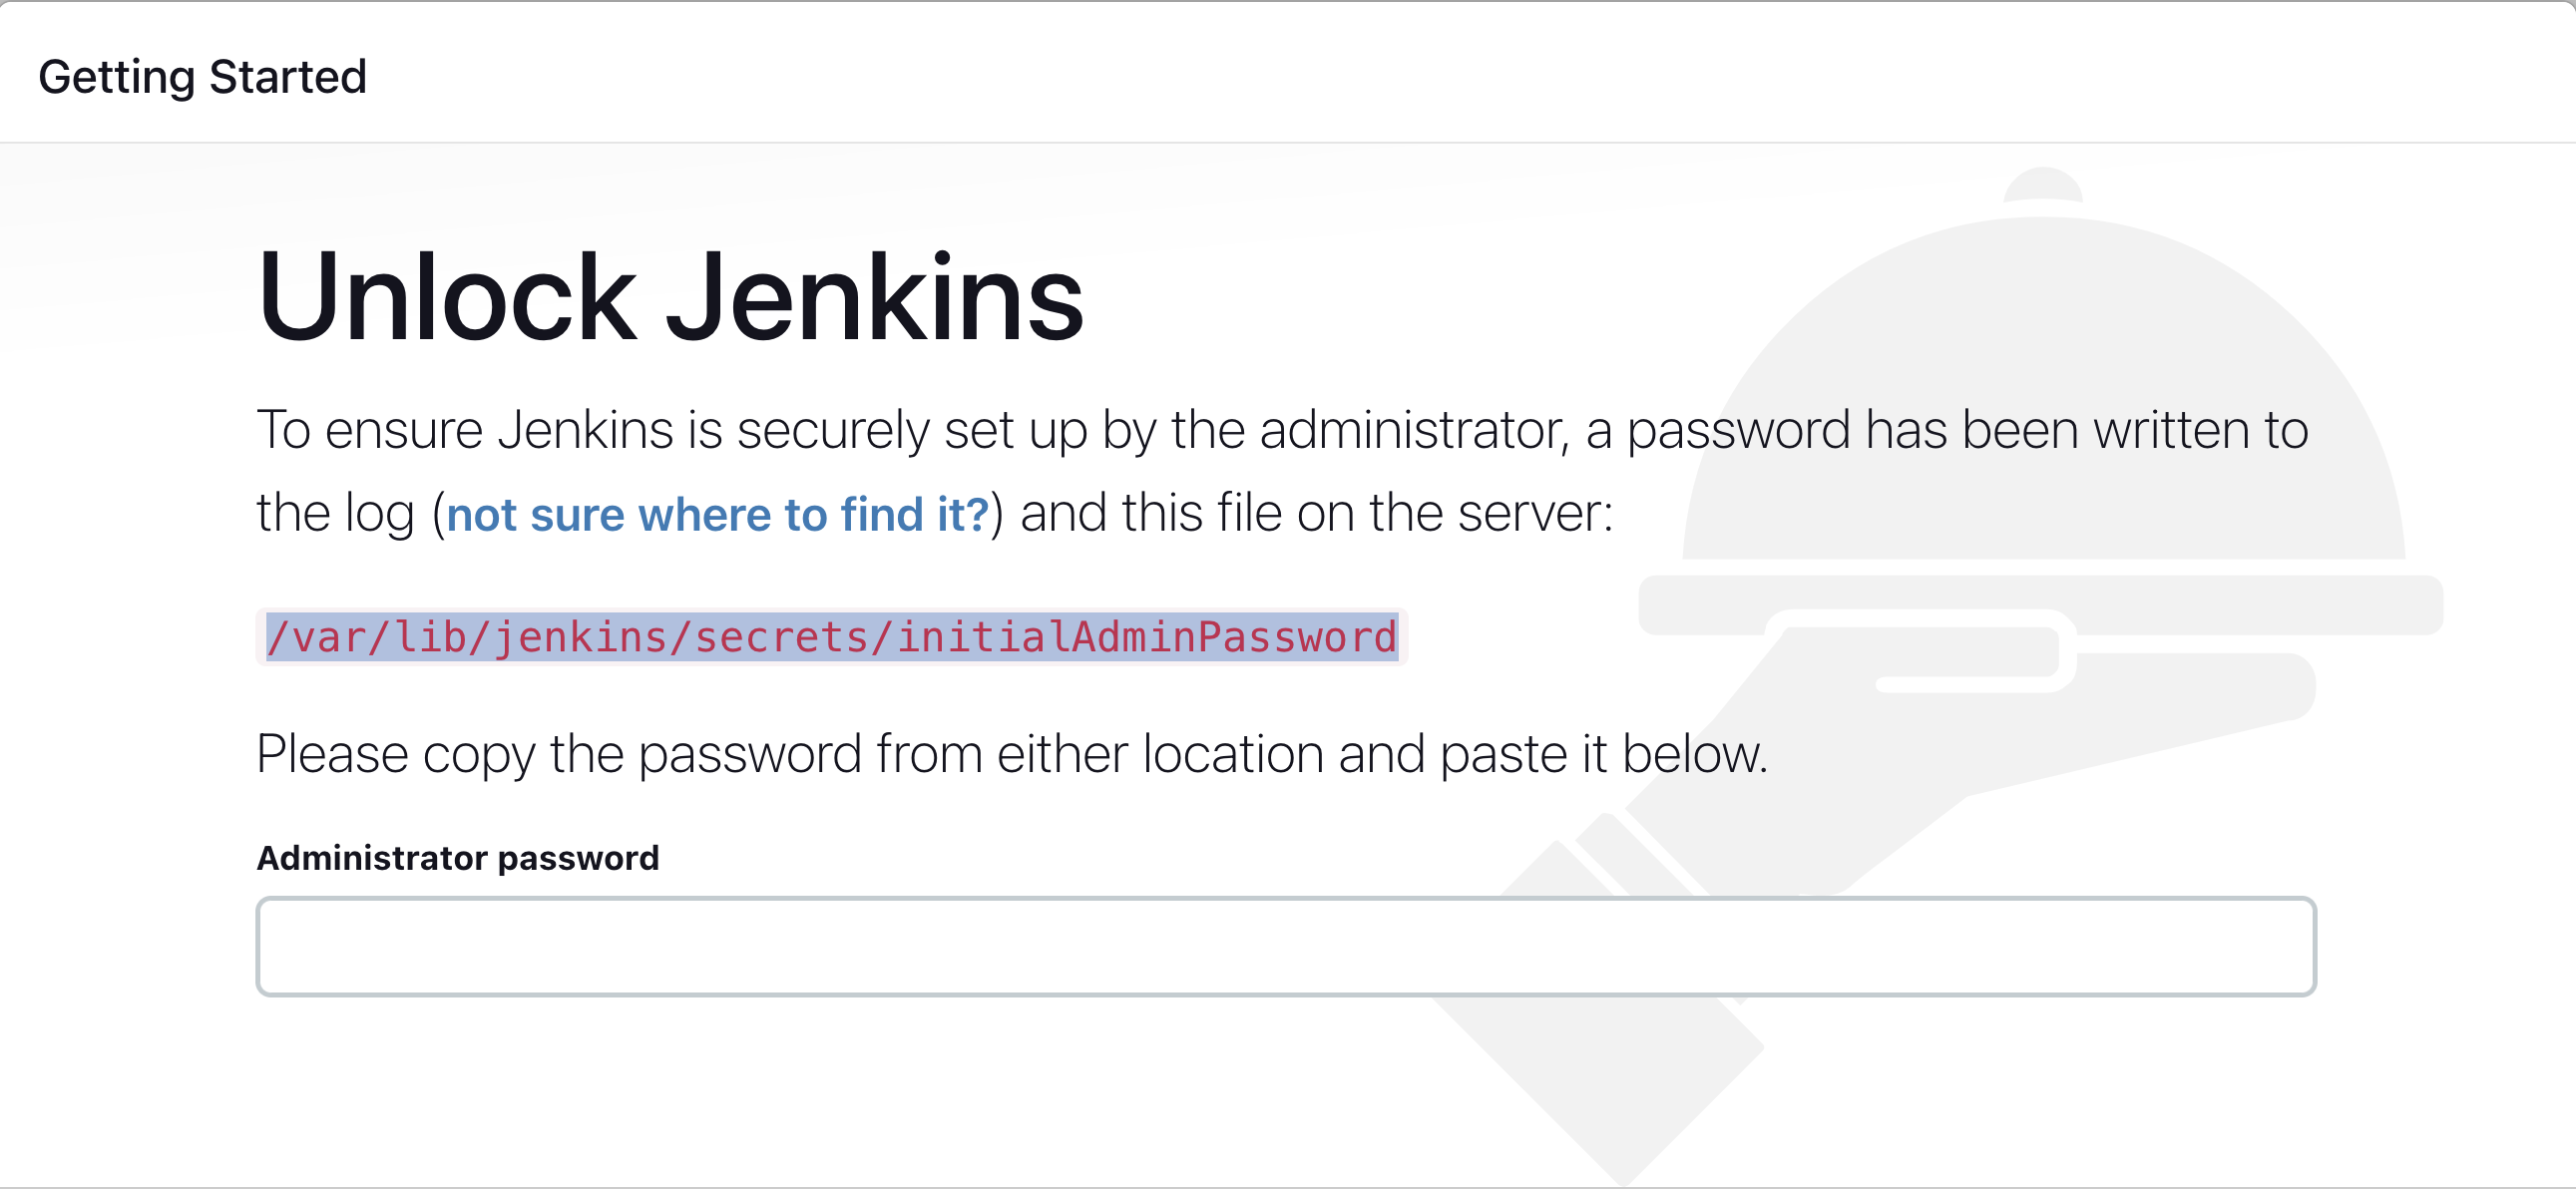
After you login to Jenkins, - Run the command on the terminal to copy the Jenkins Admin Password - sudo cat /var/lib/jenkins/secrets/initialAdminPassword - Enter the Administrator password

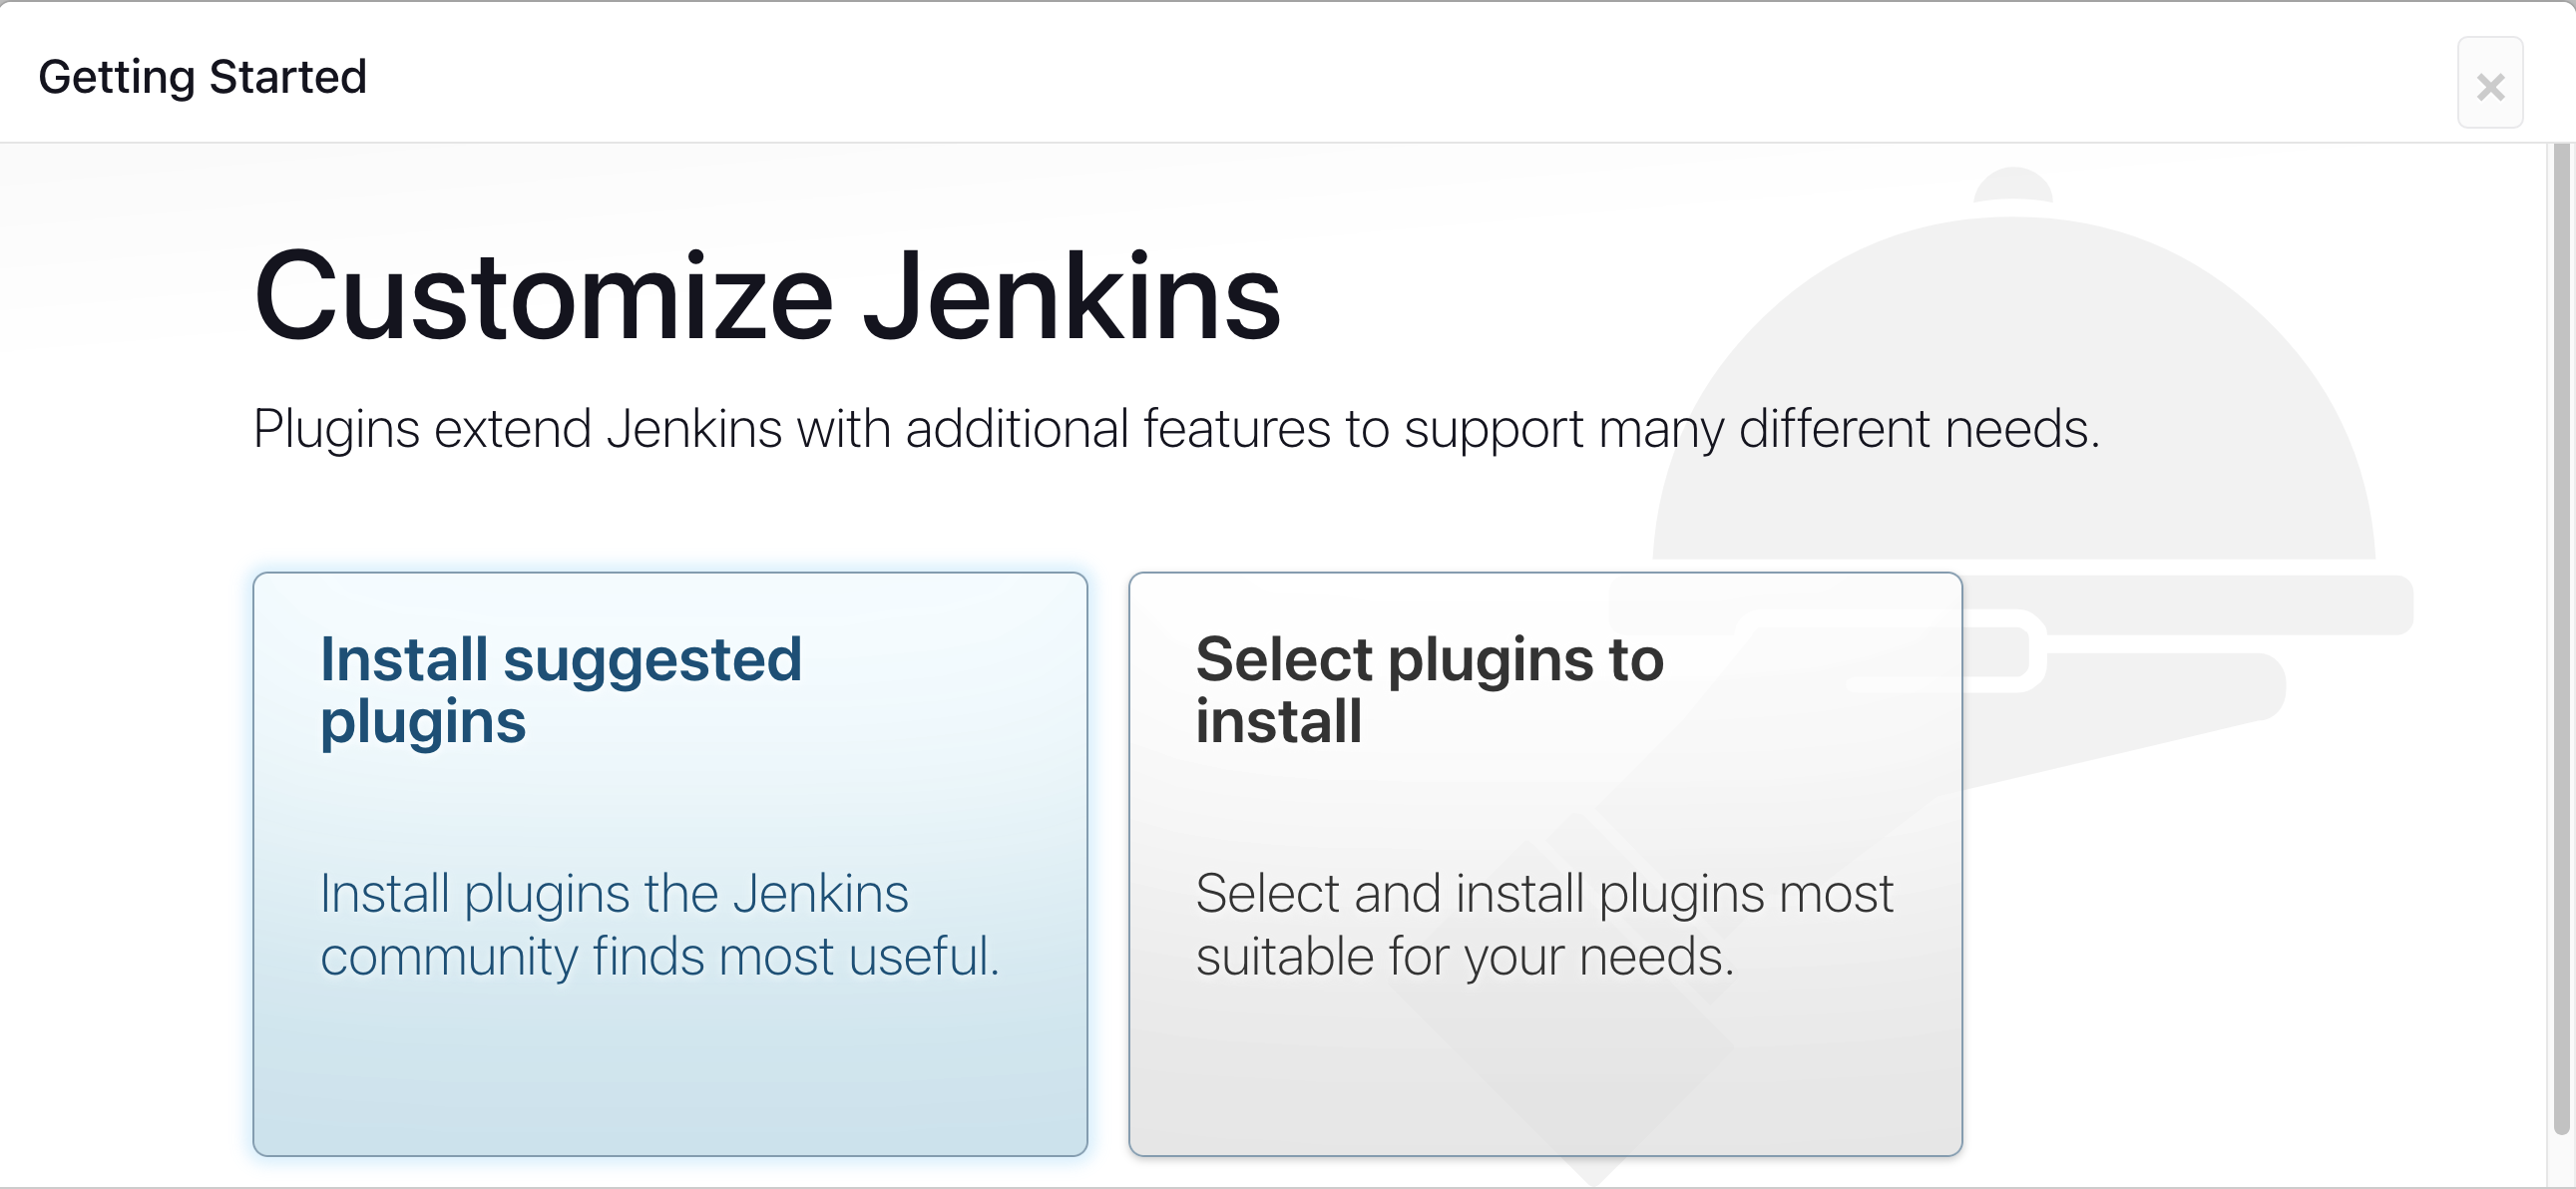
Click on Install suggested plugins

Create First Admin User or skip

Next, Save and Finish without changes

Jenkins Installation is Successful.


"🙌 Thank you for taking the time to explore this blog!📚 I hope you found the information both helpful and insightful.✨
🚀 Enjoy your learning journey, and don't hesitate to reach out if you have any feedback. 🤓 Happy exploring!"
